In the ever-evolving era of fast fashion and online shopping, an increasing number of women are opting to purchase their wedding gowns online. E-commerce platforms offer an extensive array of dresses, making it simply a matter of identifying the ideal bridal size.
Here’s an updated guide to navigating the world of online bridal sizing:
- Selecting the Optimal Silhouette
- Accurately Measuring Yourself
- Consulting the Sizing Chart
- Participating in the First and Second Fitting
Bridal Sizing Guide
Selecting the Optimal Silhouette
Wedding gowns are available in a variety of silhouettes. The overarching shape of the dress will greatly impact how it fits your figure. Various silhouettes are designed to complement different body types, making it essential to choose a silhouette that flatters your specific shape.
Ball Gown

Resembling a fairytale gown, the ball gown silhouette features a full skirt and a cinched waist. It’s a highly versatile option that suits most body types, especially those with boyish, busty, or pear shapes.
However, for petite women, the full skirt may be overwhelming. This silhouette is an ideal choice for those seeking a romantic look on their wedding day.
A-Line
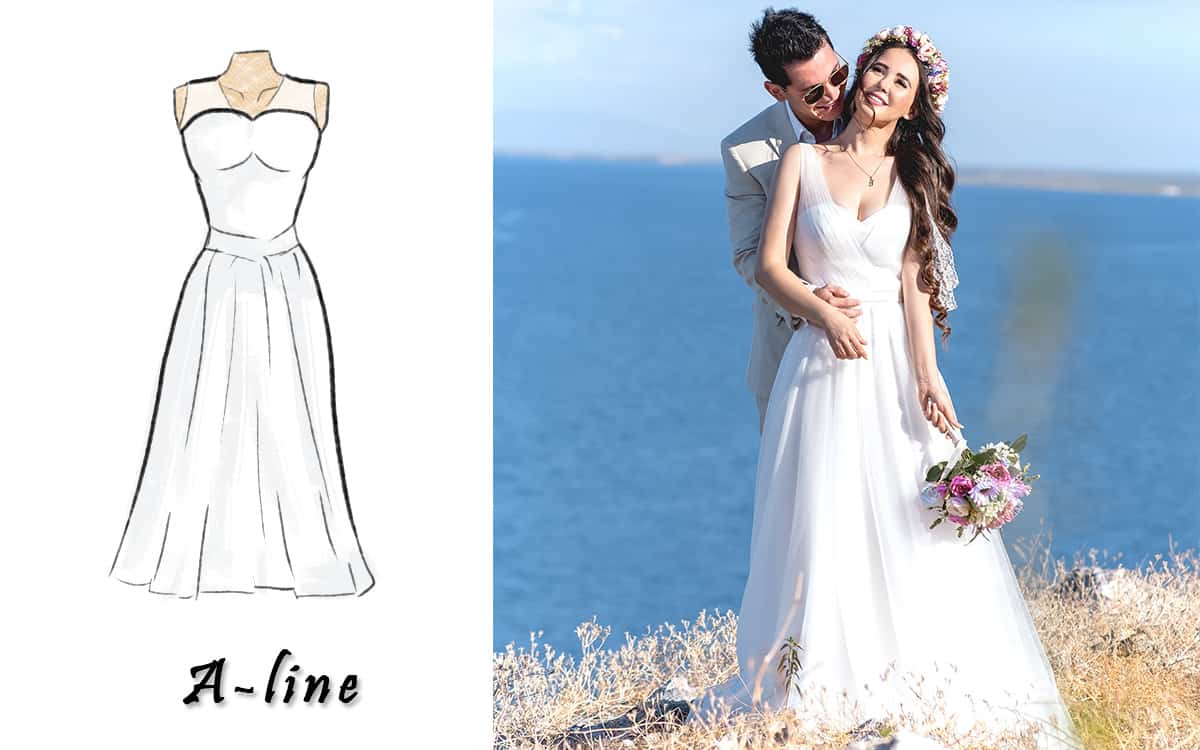
The A-line silhouette begins narrow at the top and gradually broadens downwards, making it one of the most popular wedding gown styles. This silhouette flatters almost all body types, though its angular or box-style shape may not adequately highlight curves.
Fit And Flare
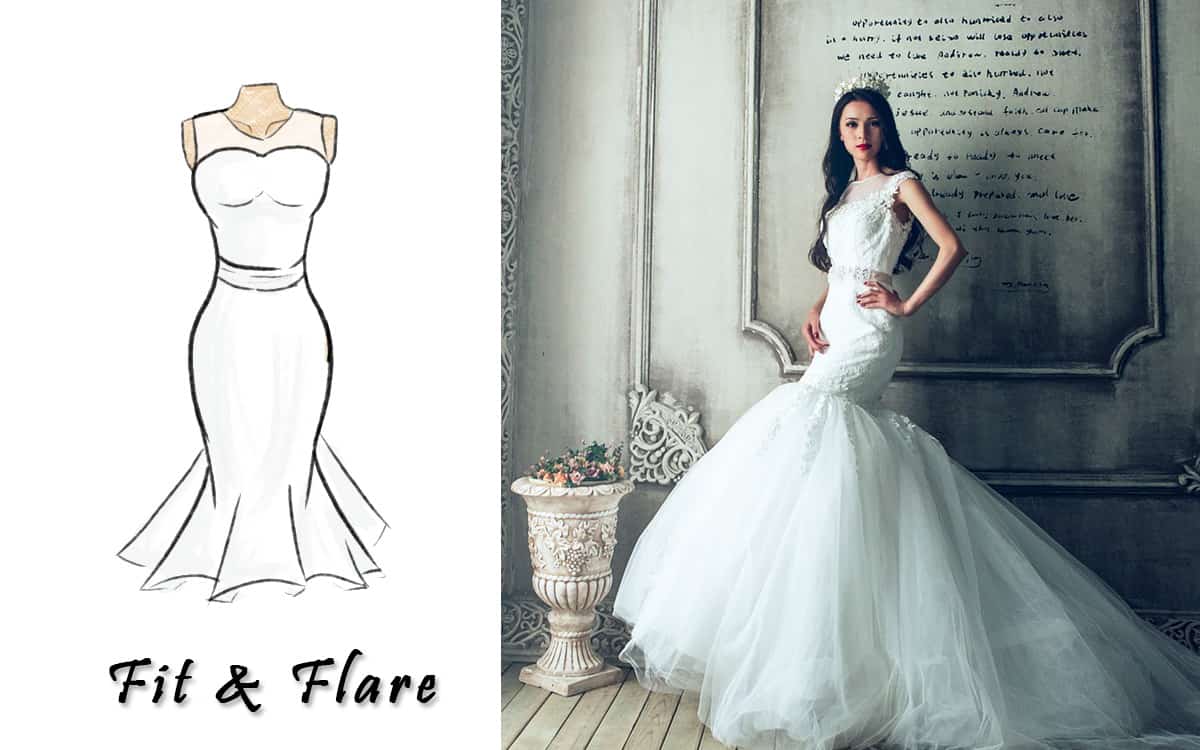
Fit and flare styles closely follow the body’s natural curves up to the knees, where the dress then flares out. This style has numerous variations, from mermaid to trumpet cuts, offering a range of sensuality levels.
This silhouette is perfect for those desiring a curvaceous and feminine look. However, certain dresses may be restrictive and limit movement.
Sheath
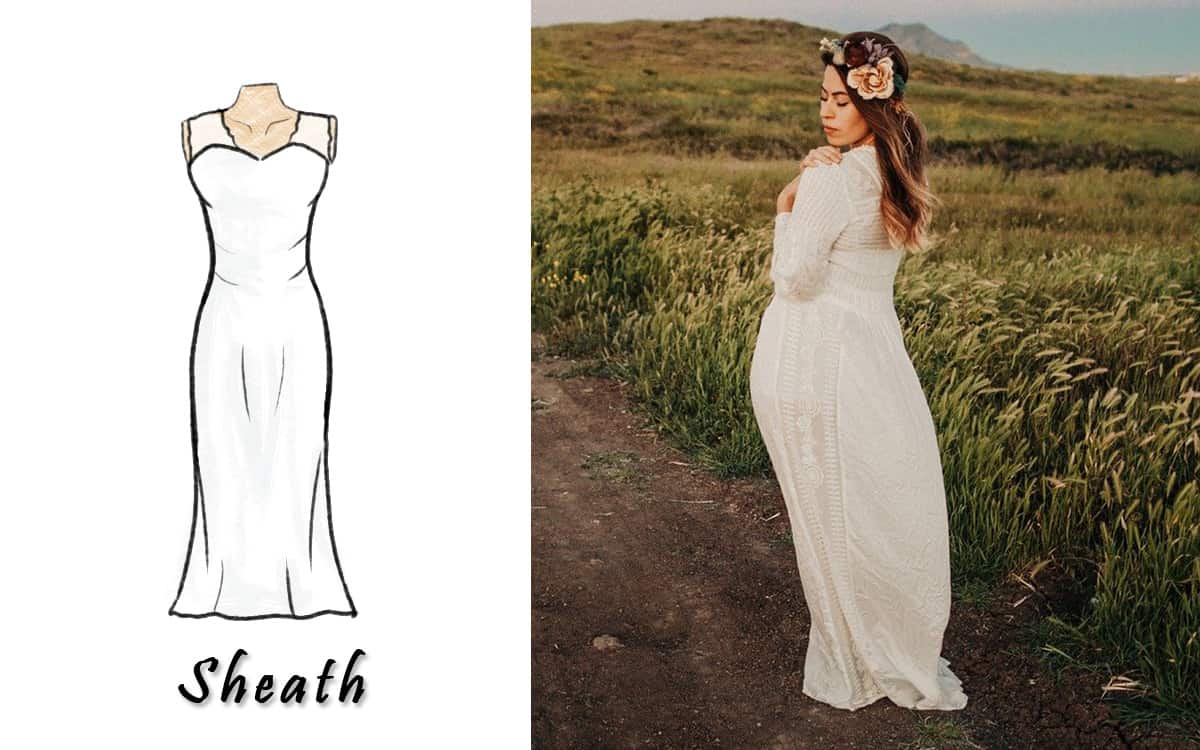
Also known as the column style, the sheath silhouette adheres to the body’s natural shape and barely flares out. If you desire a dress that radiates effortless elegance, this is an excellent choice.
It’s an ideal silhouette for lean, slender, or petite women, but may not be the best fit for busty or curvy figures.
Accurately Measuring Yourself
To begin, prepare your tape measure and a full-length mirror. Dress in form-fitting, thin clothing to ensure your measurements reflect your actual body size. If possible, wear your wedding undergarments and shoes.
Position yourself directly in front of the mirror for accuracy in your bridal sizing. Ensure the tape lays flat against your skin and isn’t too tight or loose. It’s ideal to have a friend take your measurements or consult a professional tailor if you’re uncertain.
You’ll need to take the following measurements to determine your bridal size:
- Bust. Wrap the measuring tape around your back, under your armpits, and over the fullest part of your chest.
- Waist. To find the waist, stand up straight and then bend to one side. There will be a crease that marks your waist. Wrap the tape around it.
- Hips. Stand with your feet together. Wrap the tape around your hips.
- Hollow to hem. This refers to the general length of the dress. Stand up straight and then measure from your collarbone to the bottom of your foot. This can be tricky to measure on your own which is why it’s recommended to consult a professional.
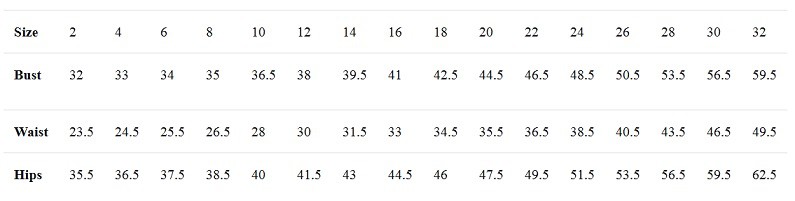
Consulting the Sizing Chart
Each bridal gown company has its own wedding gown size chart. If you already have a specific brand in mind, you should check out its bridal size chart before purchasing a gown. The chart below is a general size chart for wedding gowns. The first row represents the dress size while the first column is the type of body measurement. The measurements are in inches.
Participating in the First and Second Fitting
First Fitting
The first fitting is 8 to 12 weeks before the wedding date. This ensures that the dress actually fits the bride’s body because it’s only a few months before the wedding. It leaves enough room for dress alterations. There are two main types of alterations:
- Basic hemming. Hemming is a basic dress alteration that involves adjusting the length of the dress. The sides and the general fit are adjusted so that the bride can walk comfortably without stepping on the skirt. The fit also adjusts to ensure comfort and mobility. The main goal of the basic hemming is to make the dress hang comfortably from the bride’s body so that she’ll feel her most beautiful self. The gown should be altered in such a way that it supports the bust, accentuates the hips and general body shape, and is long enough to cover the shoes but not too long that it’s a tripping hazard.
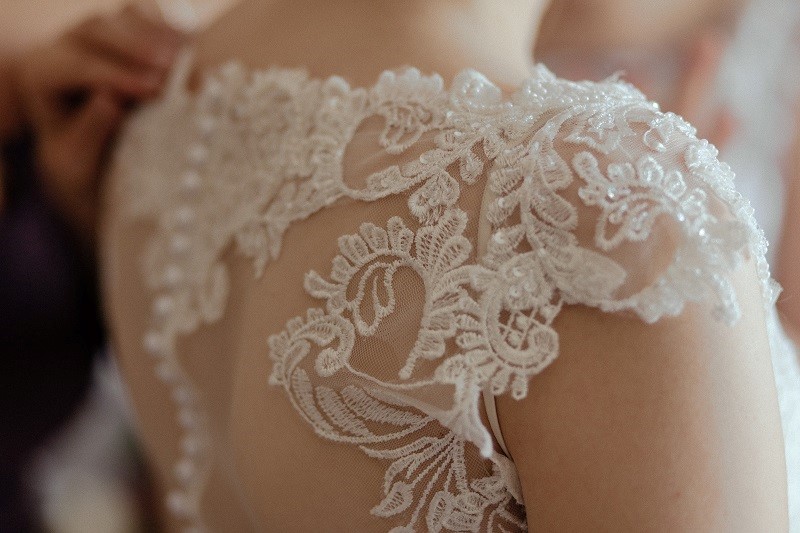
- Adding details. The tiny details add up and can change the entire wedding dress into your dream wedding dress. The first fitting is the perfect time to get these changes in. These customizations include adding lace appliques, beading, buttons, and more. This is also where the bustle is resized and added to keep the train from dragging behind the bride.
Second Fitting
The second fitting is held one to two weeks before the actual wedding day. That’s because the body won’t drastically change during this time period. While the first fitting can stretch for an hour or more, this one shouldn’t take long because the dress has already been resized to get closer to that perfect fit.
The costs of the fittings vary on how much change needs to be made. It costs around $200 to shorten the gown and resew the seams. Others charge a flat fee of $500 to $900 to cover all alterations from both fittings, including the customizations. Make sure to factor in these additional costs before you buy a wedding gown.
As a general rule, it’s advisable to buy a wedding dress that’s slightly larger than your actual bridal sizing to allow room for minor weight fluctuations.